


2004 © Ouais

My Circuit
In this section, we'll see how to build a circuit for the race-tins (1/32).
For now, I'm thinking about the way I'll do that.
Introduction
I plan to build a circuit that can be flexible, used indoor as well as outdoor.
I don't want something expensive nor too complicated.
The idea (not new, see dedicated (especially to bit char-g) forums) is to build several parts of the circuit on panels and to assemble them together.
The problem is that I want some clearing on each side of the track, before reaching the borders. These clearings must be in another material than the one used to make the track surface, because if it is the same, the cars won't be disadvantaged as they should be.
| |
Phase 1: designing (how I plan to make the circuit)Step 1 I've found panels which have 2 different sides: 1 rough and 1 smooth. So the frst step consists in cutting the panels in squares of the same size (see next phase about the size). Using squares allows us to draw any track shape we want. We must only respect track and panels width. We can also provide rectangles whose length is equivalent to n squares. Step 2 With the 2-sided panels, the idea is to cut the track from the panels. And reversing borders (clearings) so that the track will be rough and the clearings smooth. Yes, the principle, is that if the cars go outside the track, they'll slip a bit. It'll be a bit harder to drive so better stay on the track. This is the disadvantage I was looking for. If you don't have panels which have 2 different sides, I suggest to find some material (either smooth tio make the cars slide, either very rough such as carpet, to brake the cars). Step 3 Now we have the panels, we assemble them in a slot-car fashion. You may make the circuit you want. By respecting the panels and track width, you can make some original panels such as zigzag (chicanes). Bridges too may be created. Raised curves, etc. Step 4 To fix the panels together, I plan to use some battens. Drilling into them and the panels and placing screws to fix them together. You can see the detail in the fourth picture on the right. Step 5 The last figure shows how to fix battens and panels all together. We'll need different sized battens, especially because of curves. I plan to cross battens on 2 or more panels. Step 6 I'll stick some foam on the interior of the battens as they constitute the borders of the tracks. And some stickers (ads) too. But it's not time to now :) | 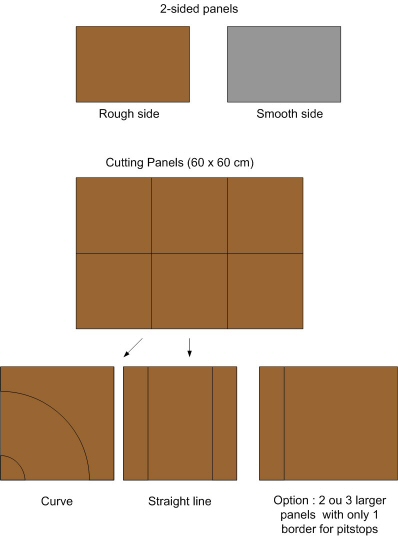  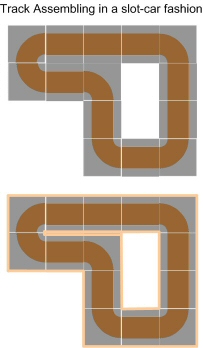 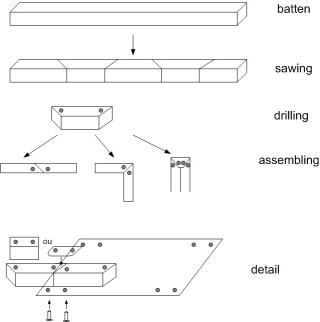 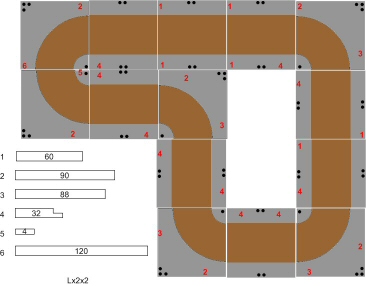
|
|
Click on pictures to see them closer
| |
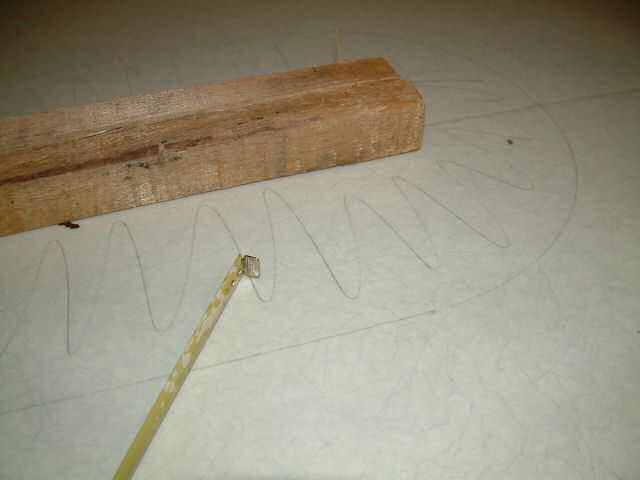
Phase 2: selecting dimensionsThe most important thing is the dimension of the panels. In that, it must fit my dining-room, so not too large, but the cars must be able to turn without problems. I calculated that the best dimension for 1 panel would be between 80x80 and 60x60. 80x80 is perfect for the cars, but too big for the room if I want enough curves. According to what I've seen in stores, 60x60 would be fine when buying some panels. The best way to decide is to try, and using the worst case for the cars: a 180 degrees angle. So I put some wood sticks on the floor using a 60x60 dimension. I drew some lines so that they are 10 cm from the sticks. The resulting track is 35 cm large. I tried with the Skyline which has a worse turning circle than the Suzuki. Results: My floor is linoneum. The particularity of this material is that when turning, cars are between grip and skid. So if I drive too fast in the 180 degrees curve, the car can't stay on the track. If I keep a moderate speed while turning, the car stays easily on the track. At last, I made the car skid and it passed the curve. But it's not efficient. To conclude, I think the 60x60 dimension is a good compromise if I can find the right material for the panels. I mean a material which will allow the cars to skid a little. There are some cheap smooth fiber panels in stores. I'll have to go try them with my tin :) | 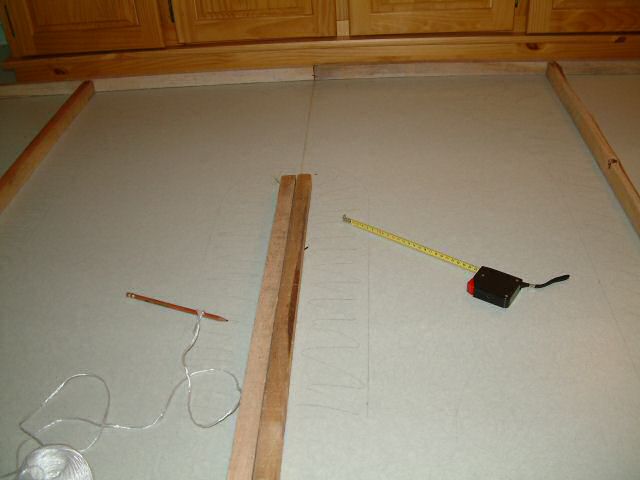

|
| |